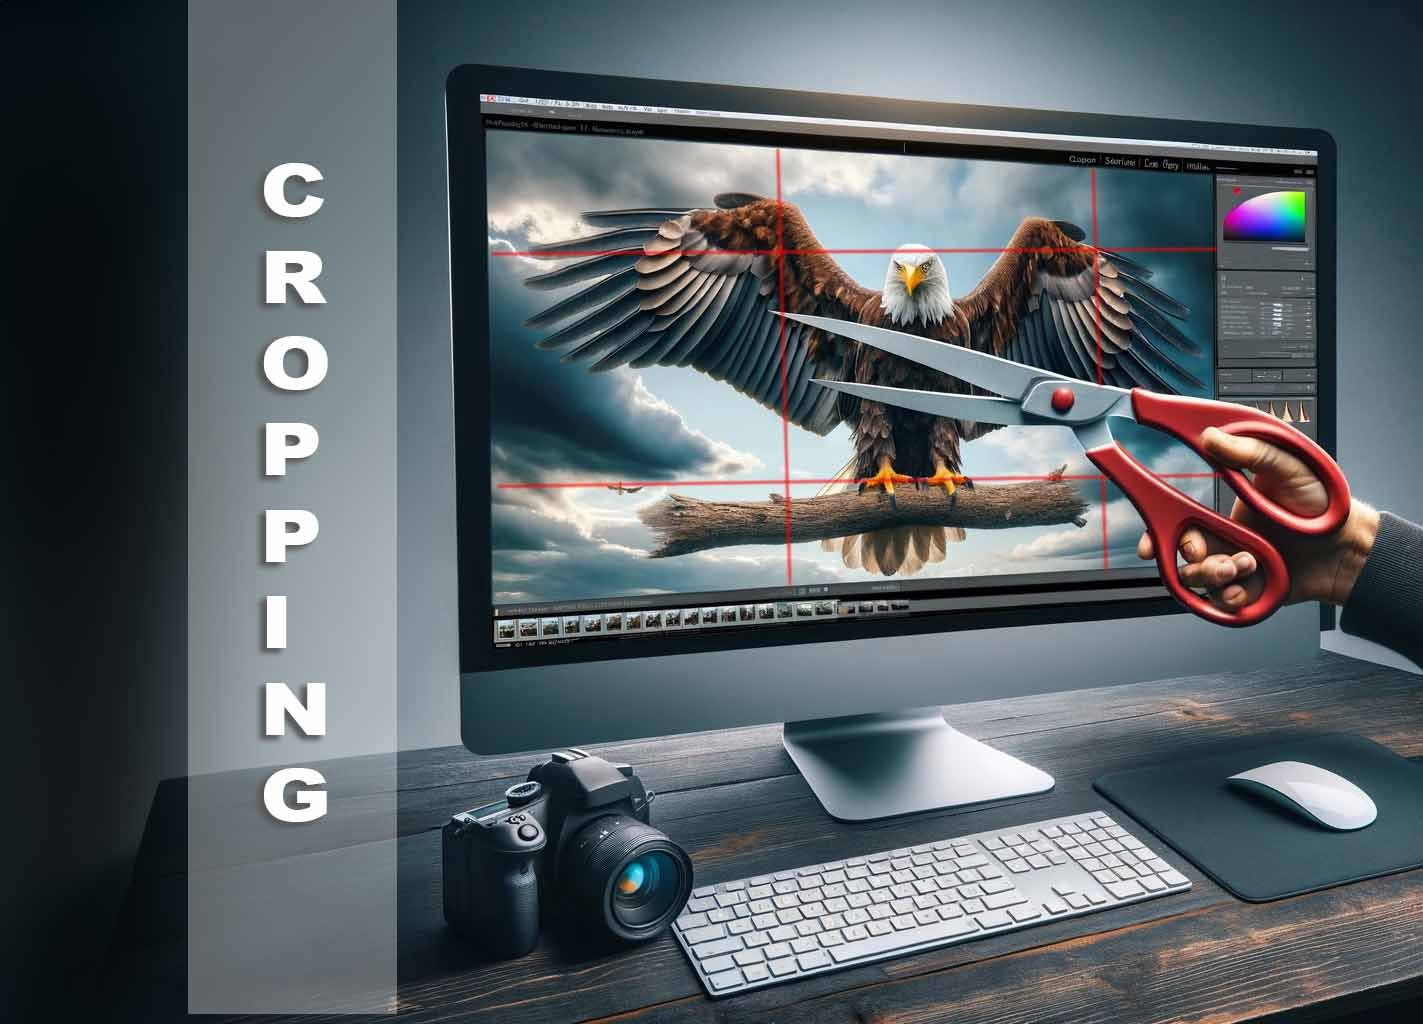
The Secret of Cropping: Achieving the Perfect Wildlife Photo
You probably know the feeling when you're out with a long focal length, like a 600mm lens, and your subjects are still too far away. It can be frustrating, right? And sometimes it's just not possible to reposition yourself or set up a photo hide to get closer to the animals.
I know this problem all too well, especially in Germany, where many wild animals often have a large flight distance. It's a real challenge to get the desired subjects close enough to the camera. The fact that we have to stick to designated paths in nature reserves or protected landscapes (and rightly so!!) doesn't make things any easier.
To overcome this hurdle, there are various techniques and approaches in nature photography. In digital image processing, the crop technique is probably the most commonly used method. This technique can address and solve various problems. It also allows you to shorten the distance to the subject without needing more focal length.
In this article, I want to discuss the various options available to wildlife photographers. I'll start with a bit of history.
History of the Crop Technique
The history of the crop technique in photography goes back a long way and has evolved significantly over time. In the past, prints were enlarged, and the term "crop" wasn't commonly used in this context. Originally applied in the darkroom (analog image development), this technique has gained a whole new significance in the digital age.

Early Beginnings and Darkroom Work
The origins of the crop method lie in analog image development during the time when work was done in the darkroom. Photographers had limited options to change the composition of the image after taking the shot. If an image was cropped afterwards, it was done physically by trimming and enlarging the photo in various ways. This was a laborious process compared to today’s possibilities.
Analog Cameras and Limited Editing Options
In the era of analog cameras, there were only limited possibilities to influence the image composition after taking the shot, as we know it today. Photographers had to carefully choose the framing since post-editing changes were more difficult. Nevertheless, post-processing existed even in the era of analog photography.
The Importance of Cropping in Digital Photography
The digital era brought new significance to cropping. Photographers can now intentionally choose sections of an image to improve composition or remove unwanted elements. This flexibility has significantly expanded photographers' creative freedom and image design possibilities. Not least because digital image development can be done by any photographer without a steep learning curve. However, the old problem of potential quality loss remains if you don't know how to proceed correctly.
Applications in Modern Photography
Today, the crop method is ubiquitous in digital photography. From professional photographers to hobbyists, everyone uses this technique to optimize their images. Especially in landscape and wildlife photography, where it is often difficult to get close enough to the subject or improve the composition, cropping is an important method to achieve impressive image representations.
The history of the crop method shows how photography has changed over time. From the beginnings in the darkroom to today's digital era, cropping has evolved from a technically demanding practice to a creative and everyday method.
Problem Solving - Cropping in Digital Image Development
Cropping, or trimming an image, is a fundamental and effective step in digital image development. Whether you want to remove distracting elements or emphasize the main subject more, proper cropping can significantly improve the quality of your photo.
What is Cropping in Digital Image Development?
Cropping is the process of trimming a digital image to shorten the distance to your subject, remove unwanted elements, or focus more on a specific area (composing). By removing border areas, you can also improve the composition of the image and direct the viewer's attention to the essential parts.
Why is Cropping Useful?
Shortening Distance: Cropping a photo can reduce the apparent distance between the viewer and the subject, allowing the focus to be placed on details or specific areas of the image.
Removing Distractions: Cropping allows you to remove unwanted or distracting elements from the image. Whether it’s heavily branched twigs or bushes surrounding the main subject, cropping can significantly improve the overall impact of the photo.
Better Composition: Cropping a photo provides the opportunity to reassess and optimize the composition. Often, photos can be improved by realigning the subject.
Emphasizing the Subject: By strategically cropping a photo, the focus can be more strongly directed towards the main subject. This can be particularly useful for drawing the viewer’s attention to the most important part of the image, such as in action shots.
Adapting to Formats: Different media and platforms often require specific image formats. By cropping, images can be tailored precisely for the intended use, such as social media or print products.
How to Crop?
Choose the Right Tool: Use the crop function or trim tool in your image editing software. Programs like Adobe Photoshop, Lightroom, Capture One, or Luminar AI offer advanced features, but even simple tools like smartphone apps can be sufficient for basic needs.
Image Composition: Consider the rule of thirds, a proven method to guide the viewer's eye.
Maintain Quality: Cropping reduces the overall resolution of the image. Ensure that the quality is sufficient for the intended use.

The crop tool in Photoshop displays a grid that helps you implement the rule of thirds to optimize your composition
What Problems Can Be Avoided?
When cropping in wildlife photography, there are some pitfalls to watch out for:
Quality Loss: If you crop the image too much, the resolution can suffer, leading to a pixelated or blurry image. This is particularly problematic if you plan to print the image or display it in high resolution.
Incorrect Proportions: When cropping, it’s important to consider the aspect ratio to ensure your images are displayed correctly on the respective online platforms. When printing your images, it is also important to adhere to common formats.
Too Tight Crop: If you place the main subject too tightly in the photo, you can lose the context and natural environment of the animal, which contributes to the overall composition in a habitat photo ("environmental shot" or "context shot"). It is important to distinguish whether you want to present an "action" or "habitat" to the viewer.
Poor Composition: A poorly chosen crop can lead to a disharmonious representation or composition. Various rules of image composition, such as the rule of thirds, can help guide the viewer’s eye to the essential parts.
Cutting Important Elements: Make sure not to cut off important parts of the main subject or other significant elements in the image. Depending on what you want to show, it might be important in an urban wildlife photo to see elements like trash cans, especially if a fox was previously searching for food in them.
Ignoring the Horizon: When cropping the image, ensure the horizon remains straight unless you are pursuing an artistic intention.
Unconsidered Adaptation to Formats: When cropping for different platforms or media, consider how the image will appear in each context. A format suitable for Instagram might not be ideal for a print or a desktop-oriented website.
Lighting Conditions: When cropping, it can appear as though the light in the image changes. Too dark or too bright areas can become more prominent and negatively affect the image.
Increase in Image Noise: Noise in your photo increases with cropping. This is because you are taking a portion of the original photo and enlarging it, which also enlarges the noise pixels, making the noise more visible. The smaller the selected section, the more noticeable the noise can become. Particularly in photos taken with a high ISO setting, heavy cropping can amplify the noise to the point that the photo becomes unusable.
Too Few Megapixels / Resolution: As mentioned in the quality loss point, if your photo has too few megapixels or a low resolution, it can bring various problems. First, loss of detail: Fine details and textures are no longer well represented, which mainly affects printouts or large screen displays. Second, degraded image quality: Trying to enlarge a small section of such a photo will significantly reduce the image quality, resulting in pixelated and blurry images. Through careful consideration and approach, you can avoid these problems, making cropping a useful technique in post-processing your wildlife photography.
Some examples to illustrate how excessive cropping can negatively impact image quality or amplify noise behavior.


Cropping on a Hardware Level – Camera Sensor
Cropping is not only a topic in post-processing but also an important factor when choosing a camera and equipment. Especially in wildlife photography, APS-C or MFT sensors are in demand alongside full-frame cameras for nature photography. This allows wildlife photographers to achieve a larger image crop even before the images are developed in post-production and the digital scissors are applied.

Example Full Frame vs. APS-C. Large image — Full Frame, red inner frame — APS-C sensor. From my article on the Sony a6700
Camera Sensor with Crop Factor
The camera sensor is the heart of every digital camera. It is responsible for converting incoming light into electrical signals, which are then processed into a digital image.
Crop Factor at the Sensor Level
The crop factor at the sensor level refers to how the image crop is influenced by the sensor size. There are different types of sensors in digital cameras:
- Full-Frame Sensor / 35mm Film: A full-frame sensor typically matches the standard format of a 35mm film known from analog photography. It serves as the base reference for calculating the so-called crop factor.
- APS-C Sensor: This sensor is smaller than a full-frame sensor and is used in many DSLRs and mirrorless cameras. Due to the smaller area, a so-called crop factor results, which reduces the image crop compared to full-frame. The image crop is smaller, and the subject appears closer in the photo.
- MFT Sensor (Micro Four Thirds): This sensor is even smaller than an APS-C sensor and is mainly used in mirrorless cameras. Here, too, the smaller sensor area leads to a crop factor that results in a smaller image crop.
What is the Crop Factor and What Does it Do?
For those who are just getting into photography, here is a simpler explanation.
The crop factor is a number that indicates how much smaller the sensor of a camera is compared to a full-frame sensor. When you take a photo with a camera with a smaller sensor, you see less of the scene than with a full-frame camera with the same lens focal length. It's like cutting a piece out of a larger picture—hence the name "crop factor." This "crop" makes the image appear as if you are closer to the subject. This can be useful when photographing wildlife at a greater distance. However, it also means that you can capture less of the overall scene when trying to take a wide landscape shot, for example.
Crop Factor per Sensor
- The full-frame sensor has a crop factor of 1.
- Smaller sensors always have a higher factor, so >1.
- APS-C has a crop factor of x1.5 – can vary depending on the manufacturer and model, e.g., Canon 1.6.
- MFT has a crop factor of x2.
What Does This Mean in Practice?
This was quite technical, and even though it was simplified, I understand that it might take some time for beginners to absorb. So here is a simplified explanation of what this means in practice for wildlife photography.
If you are shooting with a full-frame camera at 600mm, you will get an image crop of 900mm with an APS-C sensor camera: 600mm x 1.5 crop factor = 900mm. With an MFT camera, the image crop would even be 1200mm: 600mm x 2 crop factor = 1200mm.
This sounds promising on paper, right? So why go for the expensive full-frame camera and pricier lenses when you can use the crop factor with a smaller sensor?
But beware, there are also disadvantages that can be significant. However, this would be a separate topic. Here, we are only discussing understanding how cropping works on the hardware side.
Camera Sensor with High Megapixel Count
Using a camera with a higher resolution in wildlife photography has many undeniable advantages.
- Detail Richness: The higher the number of megapixels, the more details can be captured in an image. This is particularly useful for capturing fine textures of fur, feathers, or skin. This also benefits cropping, as you have more room to crop the photo while still maintaining a sufficiently high image quality.
- Crop with Teleconverter
A teleconverter, also known as a tele-extender, is an optical accessory that is placed between the camera and lens to bring objects closer.
Imagine you are using a 200mm lens on a full-frame camera and add a 2x teleconverter. Your lens now behaves like a 400mm lens, enlarging the subject in the camera/on the sensor.
Teleconverters have specific magnification factors, often indicated as 1.4x, 1.7x, or 2x. This factor indicates how much the focal length of the lens is effectively extended. For example, a 600mm lens with a 2x teleconverter would behave like a 1200mm lens.
But it is also important to note that using a teleconverter has some disadvantages, which I cannot cover in this article as it would be a separate topic. But it contributes to understanding cropping and possibilities.
As you can see, there are several ways to bring a distant subject closer in the photo. All methods have their pros and cons, and no one way is the only right way. It is more a matter of weighing options, situations, or even preferences. The most common method is cropping during post-processing of the photos. The problem of getting subjects close enough to the camera is not only faced by hobby photographers; professionals also use this technique. Otherwise, we would all be taking our pictures in petting zoos if it were so easy to get close to the animals. ;-)
FAQ – The Art of Cropping in Wildlife Photography
What does cropping mean in wildlife photography?
Cropping refers to trimming an image afterward to bring the subject closer, remove distracting elements, or improve the composition.
Why is cropping so important in wildlife photography?
Wild animals often keep a large distance and getting closer is not possible or allowed. Cropping still enables a strong visual impact.
Can cropping replace the perceived focal length?
Yes and no. Targeted cropping makes the subject appear closer without using a longer lens. However, it does not replace focal length in a physical sense—cropping also changes depth-of-field characteristics, and the bokeh often appears less smooth.
Did cropping exist in analog photography?
Yes. In the darkroom, images were adjusted through enlargements and physical trimming—much more labor-intensive than today.
What advantages does digital cropping offer?
It allows you to remove distractions, improve composition, emphasize the subject, and adapt the image to different formats.
Which software is suitable for cropping?
Adobe Photoshop, Lightroom, Capture One, Luminar AI, as well as simple smartphone apps all offer crop tools.
Why is the rule of thirds so important when cropping?
It helps place the subject in a harmonious position and guides the viewer’s eye effectively.
What common mistakes occur when cropping?
Excessive quality loss, incorrect aspect ratios, cut-off elements, tilted horizons, and unbalanced compositions.
Why does cropping amplify image noise?
Because enlarging a small section of the image also enlarges the noise pixels—especially problematic at high ISO values.
How many megapixels are useful for cropping?
The higher the resolution, the more flexibility you have for heavy cropping while maintaining image quality.
What is the crop factor of camera sensors?
The crop factor indicates how much the field of view is reduced compared to full-frame—for example, 1.5× for APS-C or 2× for Micro Four Thirds (MFT).
Why does a 600 mm lens behave like 900 mm on APS-C?
Because the 1.5× crop factor enlarges the apparent field of view accordingly.
Is a smaller sensor better for wildlife photography?
It offers more apparent reach but also comes with drawbacks such as higher noise levels and reduced light sensitivity.
What role do teleconverters play when cropping is involved?
Teleconverters extend the optical focal length. For example, a 2× converter turns a 600 mm lens into an effective 1,200 mm.
Do teleconverters have disadvantages?
Yes—light loss, reduced autofocus performance, and potential quality degradation.
Is cropping just a workaround for hobby photographers?
No. Professionals also use cropping because perfect shooting distances are rarely possible in nature.
Is cropping problematic for prints?
Yes. With heavy cropping, print quality can suffer if the remaining resolution is too low.